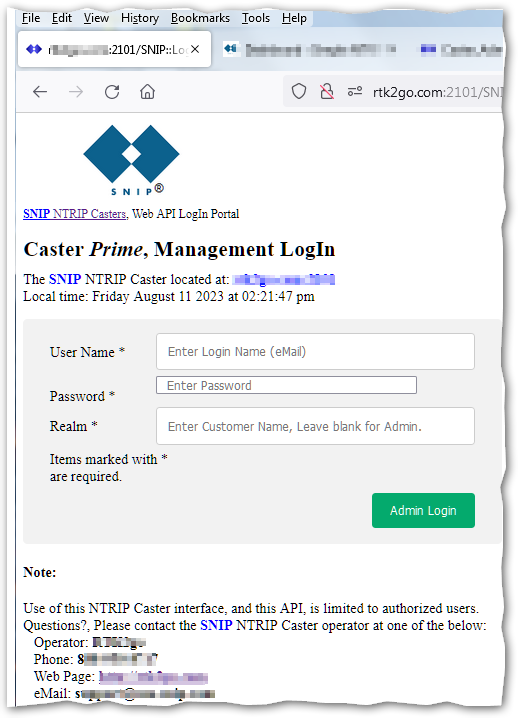
Authorized users can log into the SNIP Web API with a simple Login page. The Web API provides an alternative way to manage and administer your SNIP NTRIP Caster using any common browser. In order to use the Web API, the Plug-In module must be present and active.
How
In order to log into the Web API you must use either the Admin account and password, or a Customer Account, realm name, and password. These are created and managed by the Caster Operator.
The login process is similar to any other web site. The user enters a name (in this case the Customer or Staffs primary eMail account – and this is NOT case sensitive) and the assigned Password. The Customer must also enter the Realm, which is the nickname you have assigned to that customer. [See below for a shortcut.] If the credentials are accepted, a session is established and the user is taken to the Web API top page. This page is the launching point for all other operations the user account can perform. It is described further here.
Where
The login page can be reached at the URL of your caster with “/SNIP::Login” appended. For example, if your Caster is located myNtrip.example.com on port 2101, you would enter: myNtrip.example.com:2101/SNIP::Login If your Caster does not have a registered domain name, you would enter the IP address in its place, just as you do for NTRIP Client connections.
Modes
A unique aspect of the SNIP Web API is that each email account has two different passwords.
- There is a “read-write” password which is allowed to change (edit, create, delete) various settings that the User Account is authorized to manage, as well as view them.
- And there is a “read-only” password that allows viewing various key details, but does not allow editing or deleting them.
You can create both of these or just one, or none as suits the operational need of your Caster. This is managed in the Customer Accounts dialog (menu command: Setup ⇒ Manage Customer Accounts… then select the customer you wish to edit). See this page for further details.
As the SNIP operator, you may elect to provide this right to selected Customer Accounts as you see fit (and any Staff member accounts you create for them). For example, you might decide not to allow any Customer Accounts to use the Web API, providing it only for your own support staff to use. You might provide “read-only” rights to selected customers so they can troubleshoot the User Accounts (NTRIP Clients) that they manage. You might allow selected Customer Accounts to be able to add new User Accounts, or new Base Stations. You can also preset the number Users or Base each user is allowed to create (if any). This topic is discussed in more depth in this article.
The eMail used for the Admin account (which is under the Preferences dialog, (menu: Edit ⇒ Preferences ) can edit, delete, and see reports about all users and bases, regardless of any ownership by Customer Accounts. Adding and managing Staff members for the Admin account can also be found there. But if the Admin account (or a staff member) is logged on in “read-only” mode it cannot change the information it sees.
Entering the Realm, a hint
You can enter the realm (when used) on it’s own line, or as part of the eMail address. Just precede the eMail address with the realm and add “:” as a separator.
For example; if you email is “myEmail@myDomain.com” and your realm is “myCaster” you could enter both of these in the email line as: “myCaster:myEmail@myDomain.com” when you log in. When this format is used, the content of the realm entry is ignored.
By entering the data this way, many browsers will offer to remember the credentials for you the next time you log in.
On/Off
The core Web API functionality is set in the Preferences dialog, (menu: Edit ⇒ Preferences ) where you can enable/disable it and control a number of basic settings concerning the default web page contents.

